Permissions
Permissions
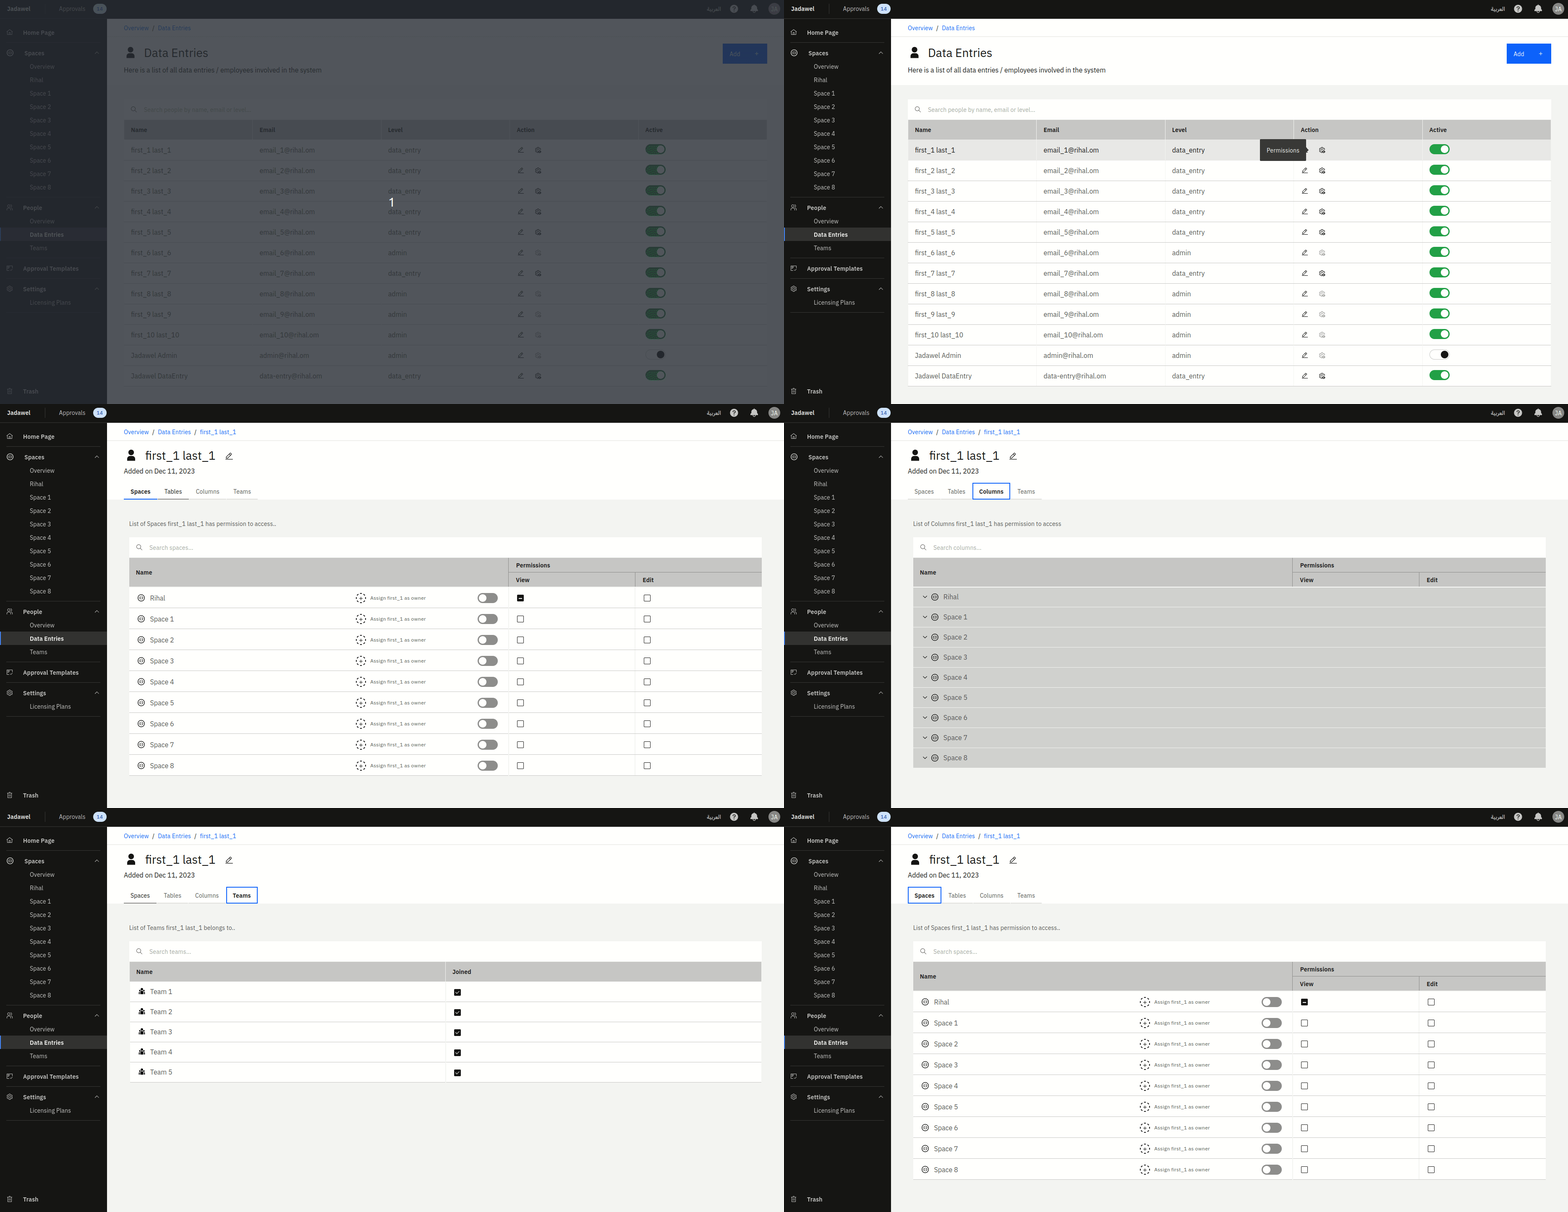
In Jadawel, we have a comprehensive system of permissions that allow you to control who can access and edit specific spaces, tables, and columns. These permissions can be customized based on roles and teams, and you can even set constraints on individual user permissions for greater control. Additionally, changing permissions for a higher-level object (such as a space or table) will apply to all lower-level objects (such as columns or specified rows) within it. Furthermore, changing the team permission for a space, table, or column will affect all the users’ permissions inside that team. Our permissions system provides a powerful way to manage data access and editing privileges for your organization.
Permission Types:
- No read/no edit: The user cannot view or edit the specified space, table, or column.
- Read only: The user can view the specified space, table, or column but cannot make any changes to it.
- Read/edit: The user can view and edit the specified space, table, or column.
Permission Levels:
- Space Level The user can view or edit the tables and columns and rows within the specified space only.
- Table Level: The user can view or edit the columns and rows within the specified table only.
- Column Level The user can view or edit the rows within the specified column of a table only.
- Row Level The user can view or edit the specified rows based on the applied conditions.
Row Level Permissions
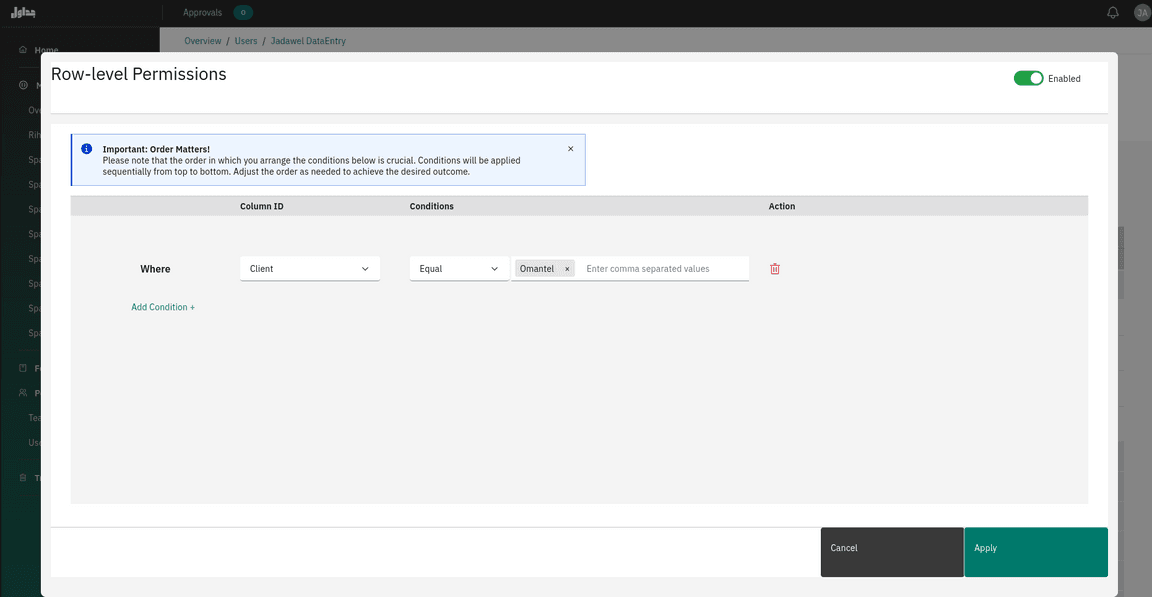
A powerful permission feature that allows you to control the rows in the data grid of a table for the data entry users .This means you can control and specify which rows a user can view , edit and interact with based on certain conditions while other rows are hidden from user’s view as they do not meet the conditions.
Constraint Types:
- Limiting the user to only view their own rows/records for a specific column.
- Specifying a range of numbers that the user can see for a specific column if the column type is a number.
- Specifying a specific text value that the user can see for a specific column. For example, the user can only see rows that have the text value “India” in a specific column.
By using these permissions and constraints, you can ensure that users have access to the data they need without compromising the security or integrity of the data.

How to apply Row Level Permissions:
- Navigate to Permissions: Go to the table’s permissions section for the user.
- Select the Table to Filter: Click on Row-level Conditions and use the provided form to select the column that you want to filter. This column will be used to determine which rows a user can see or edit.
- Define Conditions: Apply specific conditions to the selected column to filter rows. Different conditions can be applied based on the type of column (e.g., numeric, date, text). Each condition requires condition value.
Types of Conditions
Different conditions can be applied depending on the column type:
- Equal: Show rows where the column value exactly matches the provided value. Applicable to all column types.
- Not Equal: Show rows where the column value does not match the provided value.
- Greater Than: Show rows where the column value is greater than the provided value. Applies to numeric columns.
- Less han: Show rows where the column value is less than the provided value. Applies to numeric columns.
- Greater Than Or Equal To: Show rows where the column value is greater than or equal to the provided value.
- Less Than Or Equal To: Show rows where the column value is less than or equal to the provided value.
- Type From X To Y: Show rows where the column value falls within a specific range. Applies to columns with data ranges.
- Between X And Y: Show rows where the column value is between two specified values.
**Note that the order of conditions is significant. Conditions will be applied from top to bottom in order. Modify the order as needed to get the desired outcome.
